

Submitting Your First Pull Request (pr)
A Guide To Creating a Pull Request on GitHub

I am a technical writer and software developer who is passionate about contributing to open source, improving technical documentation and advocating for gender diversity in open source collaboration.
Now that we’ve learned about Open Source and its benefits in my previous article, let’s create our first pull request to the first-contributions repository.
Overview
As a developer, you and your team may have a single codebase that you are working on and tasks have been assigned to different teams and everyone could work on the project simultaneously. What happens when two developers update the same file at the same time? This is the reason version control is necessary.
“Version control, also known as source control, is the practice of tracking and managing changes to software code” - Atlassian
Without version control, you would be overwriting each other’s work.
Objective
The goal of this article is to guide you through the GitHub contribution workflow for open source projects on GitHub by adding your name to the list of contributors in the first-contributions repository on Github.
Creating a Pull Request
A pull request is a request for the repository owner or maintainers to commit your changes to their repository. Submitting a pull request tells them what you have changed and allows them to provide their feedback on the changes.
A pull request does not have to be finished work. It is usually better to open a pull request early so that others can track your progress or give you feedback.
To create a pull request, you need the following:
- A Working Computer System
- Internet Connection
- Integrated Development Environment - IDE (optional)
- Github Account
- Git (installed locally)
Steps in Creating a Pull Request
Step 1: Understand the Contribution Guidelines
This is an important step in contributing to an open source project. Most open source projects have their contribution guidelines stored in a contributing.md or readme.md file.
Review the contribution guidelines in the Readme.md file for the first-contributions repository on Github.
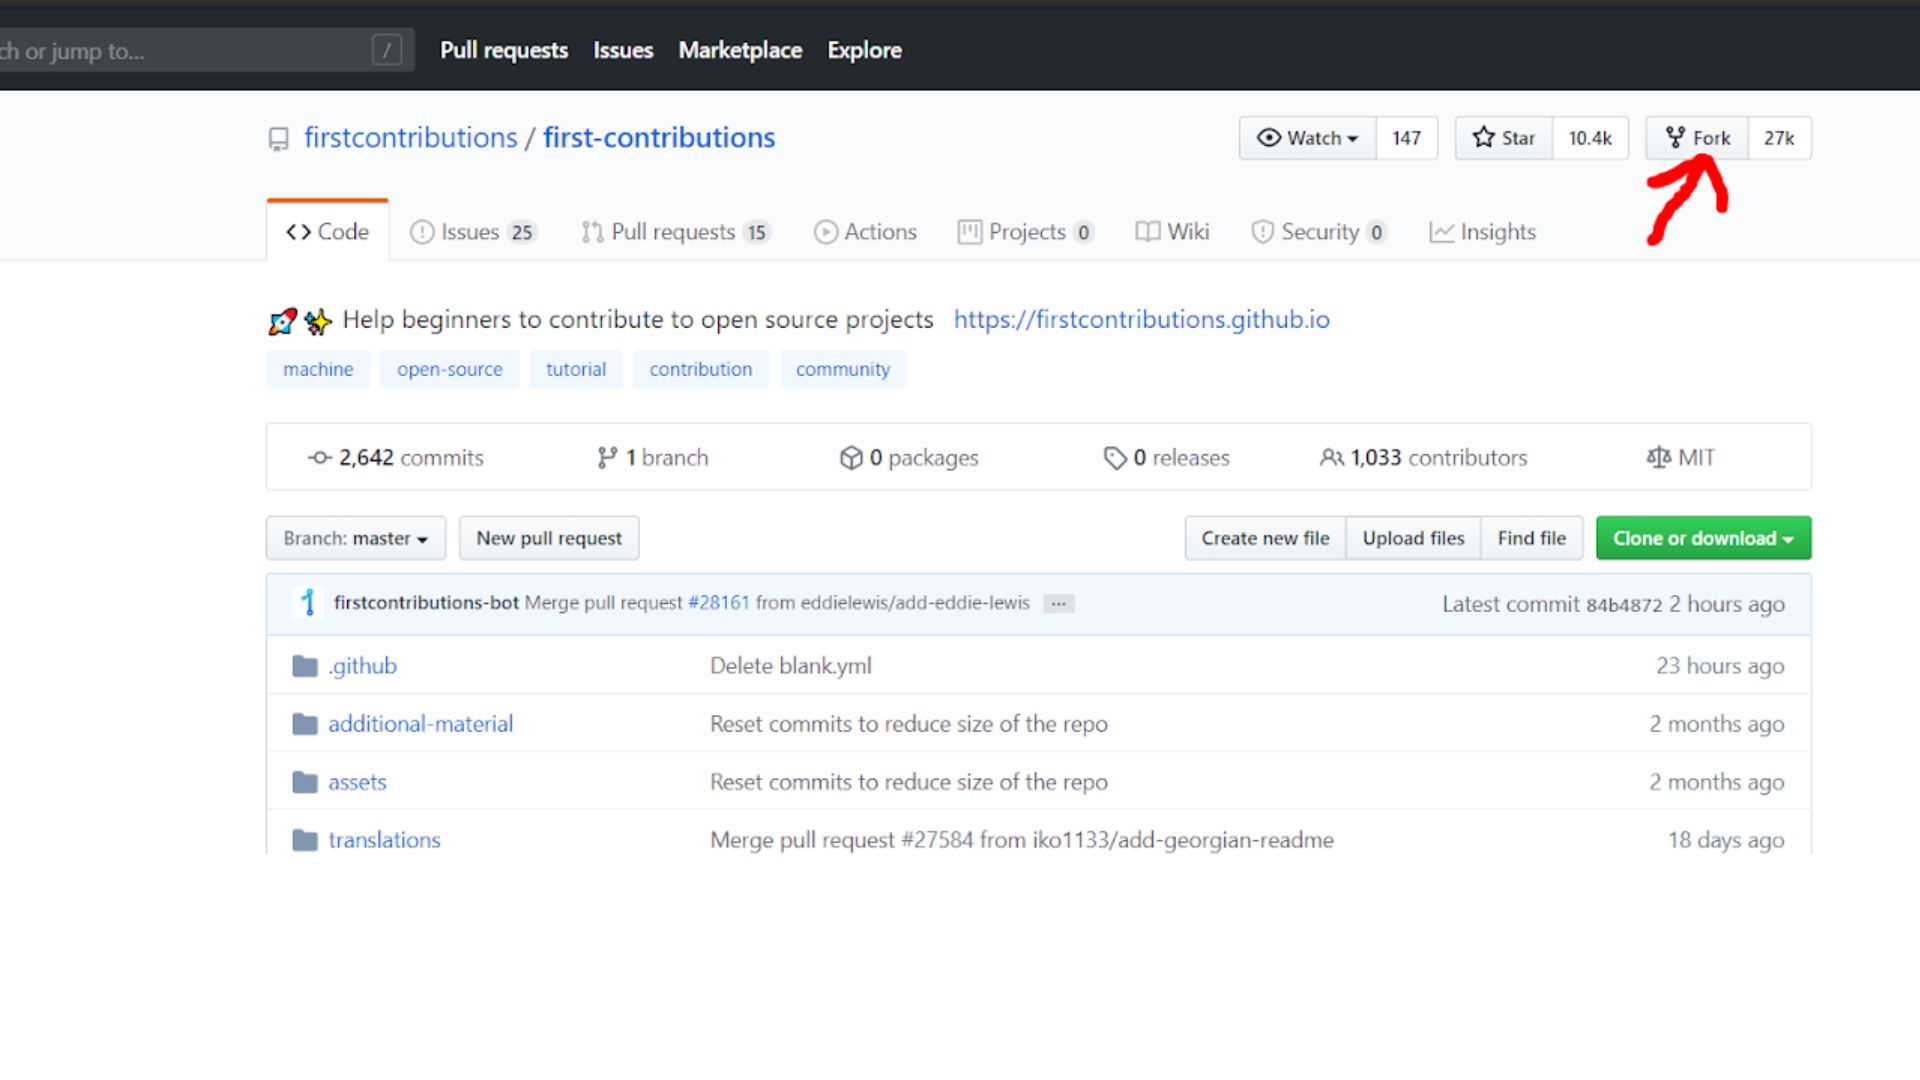
Step 2: Fork Repository on Github
Forking the repository enables you to create a copy of the repository in your account.
To fork the repository:
Go to https://github.com/firstcontributions/first-contributions and click on Fork at the top right corner of the webpage.
After clicking, you should be redirected to the page below. Notice that the repository is now in my account -
zaycodes.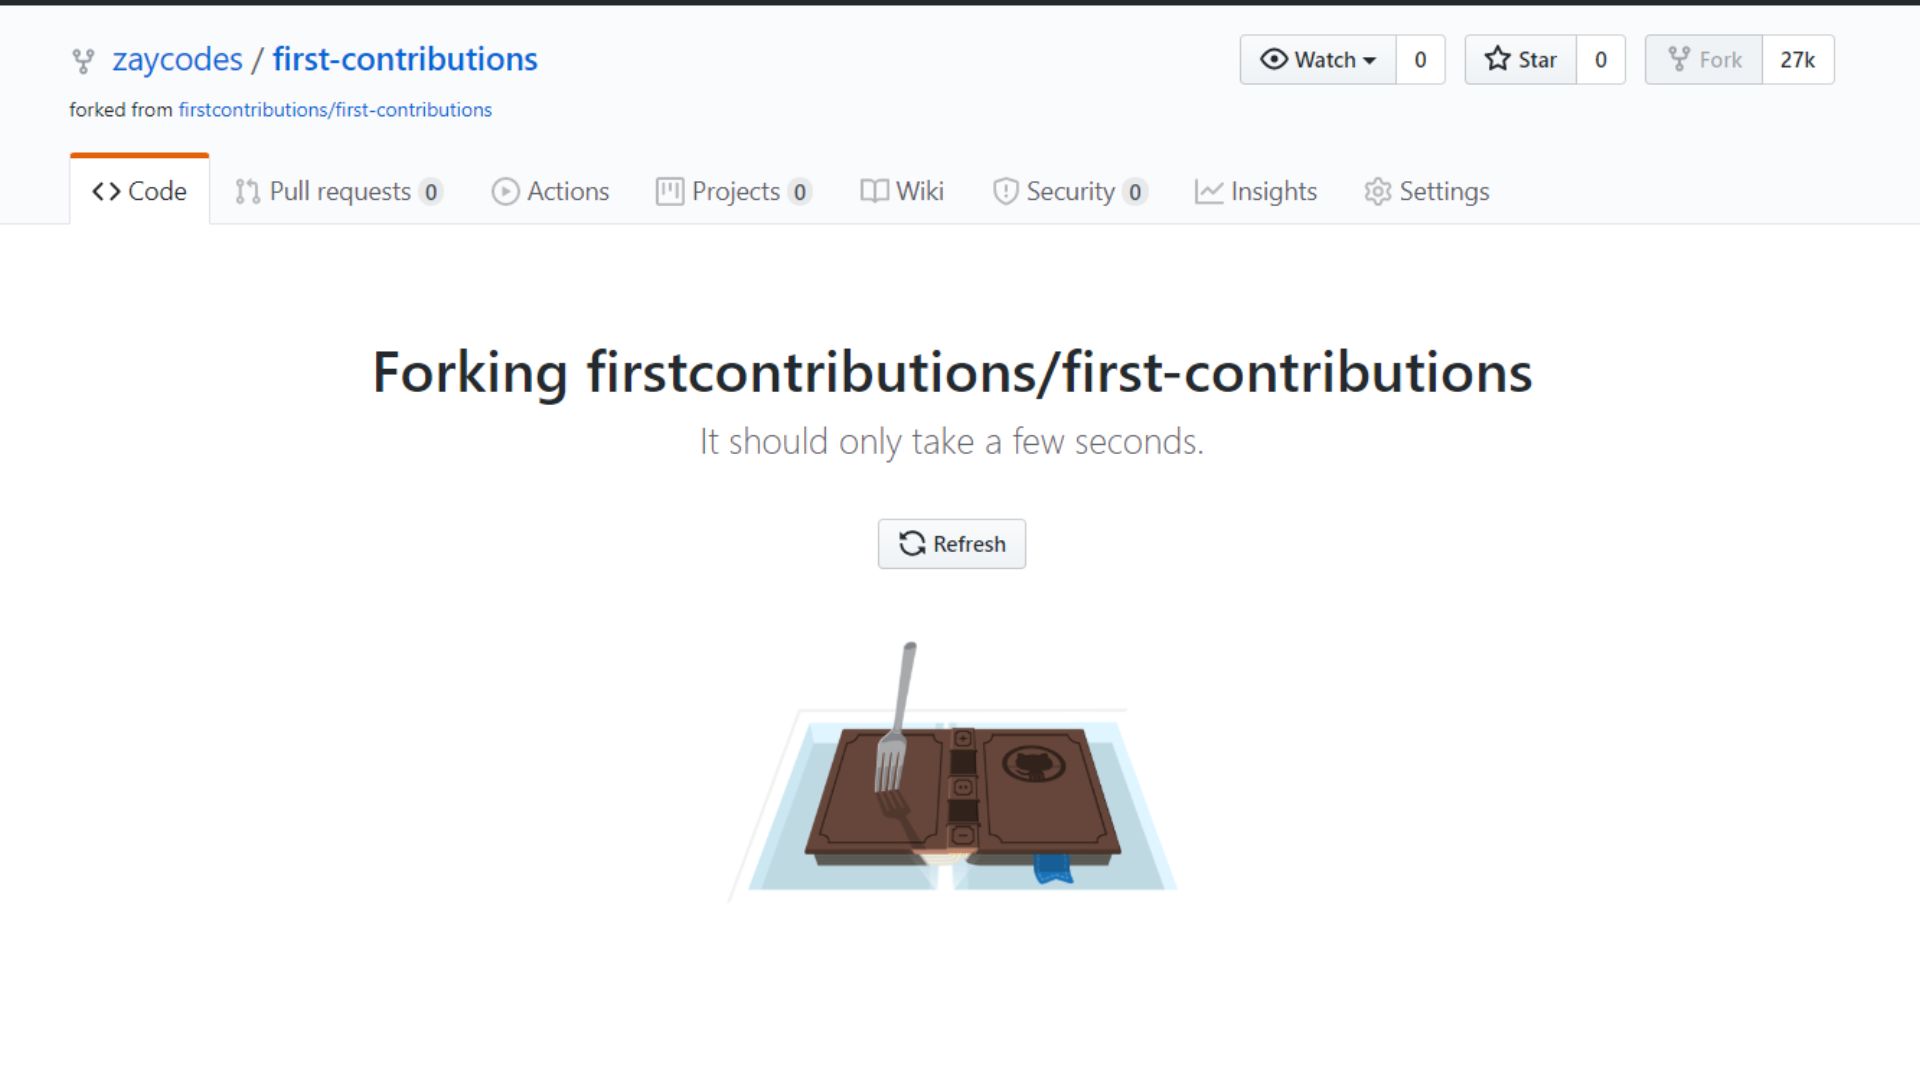
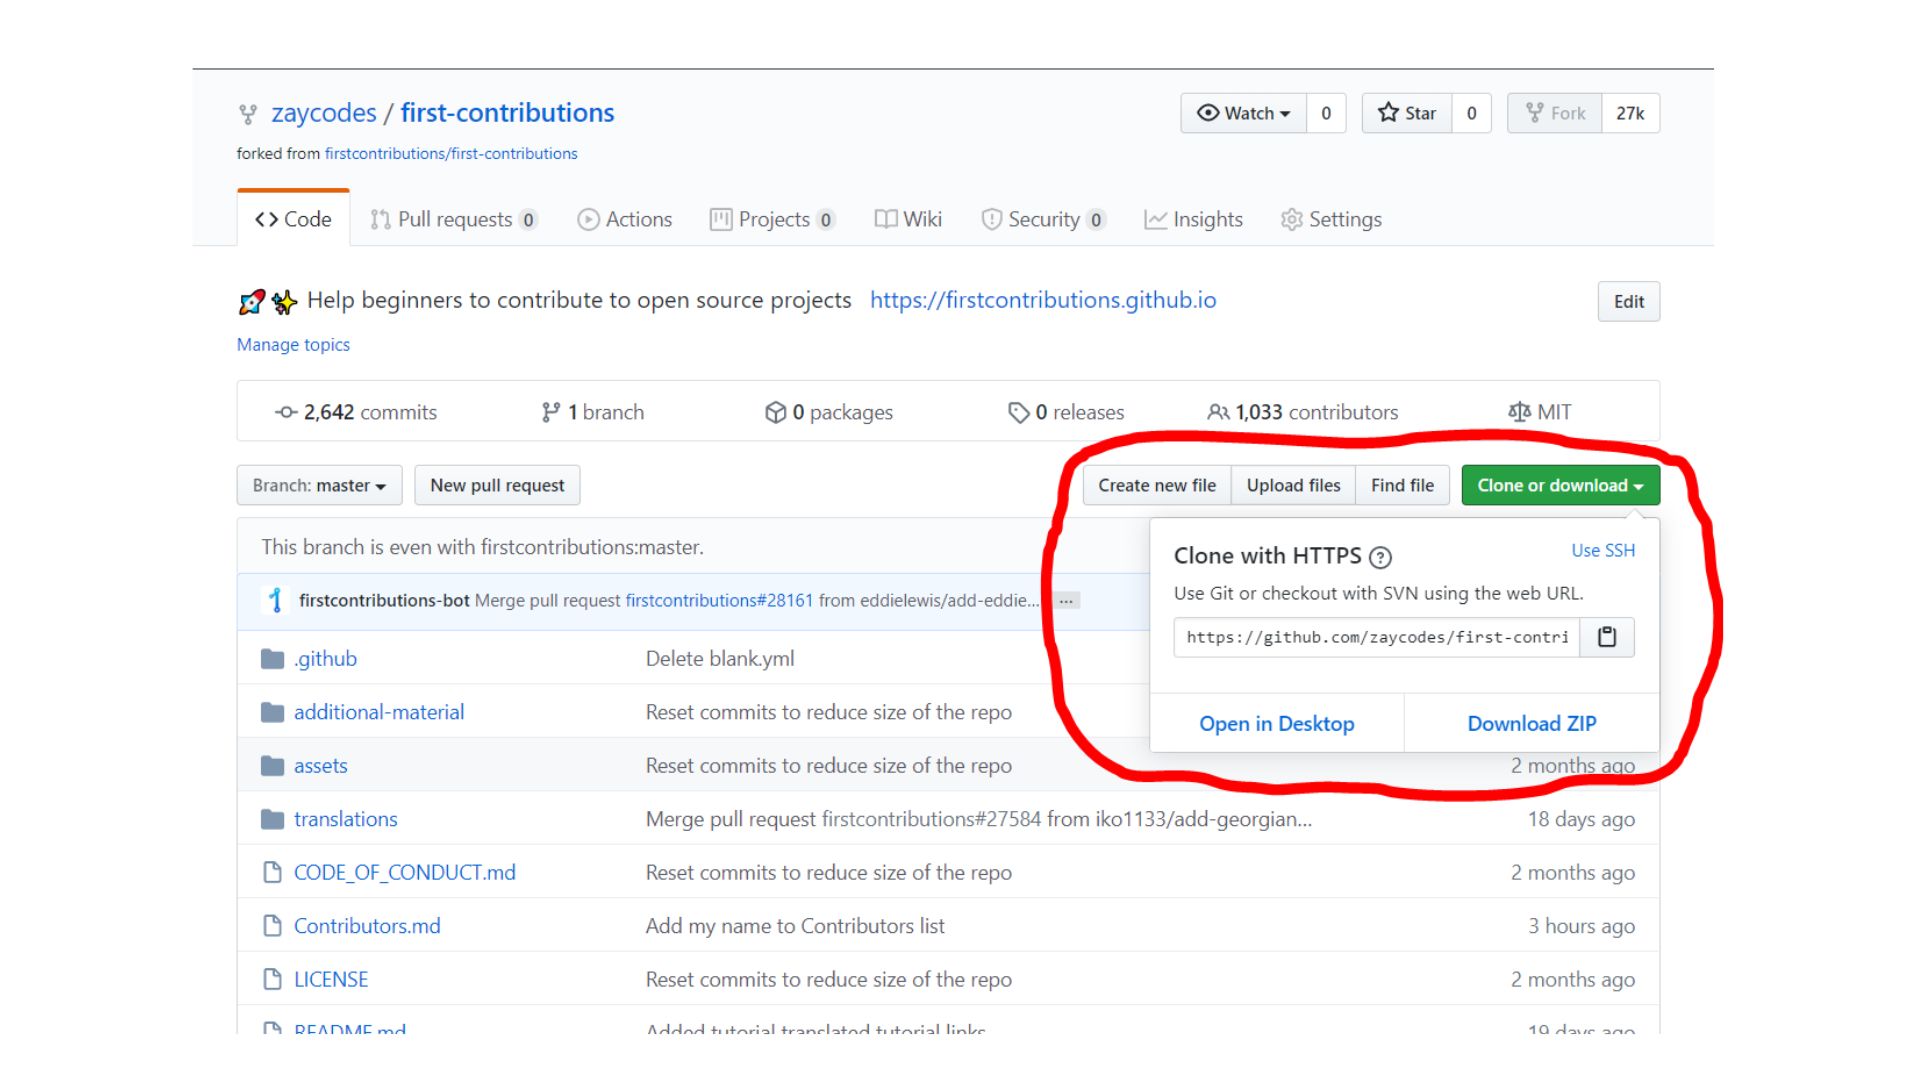
From your new repository page on GitHub, click the green button labeled Clone or download, and in the Clone with HTTPs section, copy the URL for your repository.
Step 3: Clone the Newly Forked Repository
You need to clone your newly forked repository to your machine to make changes locally.
To clone the your repository:
- On your local machine, open your bash shell or command prompt and change your current working directory to the location where you would like to clone your repository.
- Copy your repository from GitHub to your local computer using the git clone command:
git clone https://github.com/URL-TO-REPO-HERE
You should get an output like this:
Cloning into 'test-repo' ...
remote: Counting objects: 5, done.
remote: Compressing objects: 100% (4/4), done.
remote: Total 5 (delta 0), reused 0 (delta 0), pack-reused 0
Unpacking objects: 100% (5/5), done.Checking connectivity... done.
Step 4: Set Upstream - (Optional)
Upstream refers to the original repository that you forked.
To track the changes in the original repository:
- Add
upstreamto the list of remotes by using the command:git remote add upstream https://github.com/firstcontributions/first-contributions.git - Fetch the latest changes from upstream's master and merge them with your repository's master branch:
git pull upstream master
Step 5: Create a New Branch
A branch is simply a copy of the main branch that you can change without the changes being propagated to the main branch. By creating a branch, it is possible to work on multiple features simultaneously without affecting the existing code.
Create a branch using the git checkout command: git checkout -b
For example: git checkout -b add-zainab-daodu
(Including the word “add” to the branch name isn't mandatory, but it's reasonable because this branch is meant to add your name to a list.)
Step 6: Make Changes and Stage Them
The change you will make here is to add your name to the Contributors.md file. The following steps will help you accomplish this:
- Find the folder where you cloned the repository in Step 3.
- Open
Contributors.mdfile in a text editor, and add your name to it. (Don't add it at the beginning or end of the file. Put it anywhere in between.) - Save the file.
- After saving the file, if you go to the project directory and execute the command:
git status, you'll see your changes. - Add/Stage those changes to the branch you just created using the git add command:
git add Contributors.md.
Step 7: Commit Your Changes
Save your changes to the local repository using the git commit command:
git commit -m "Add <your-name> to contributors list"
Step 8: Push Changes to Github
When you push your changes, the contents of the local repository are uploaded to a remote repository on GitHub.
Push your changes with this command:
git push origin <add-your-branch-name>
Replace <add-your-branch-name> with the name of the branch you created earlier.
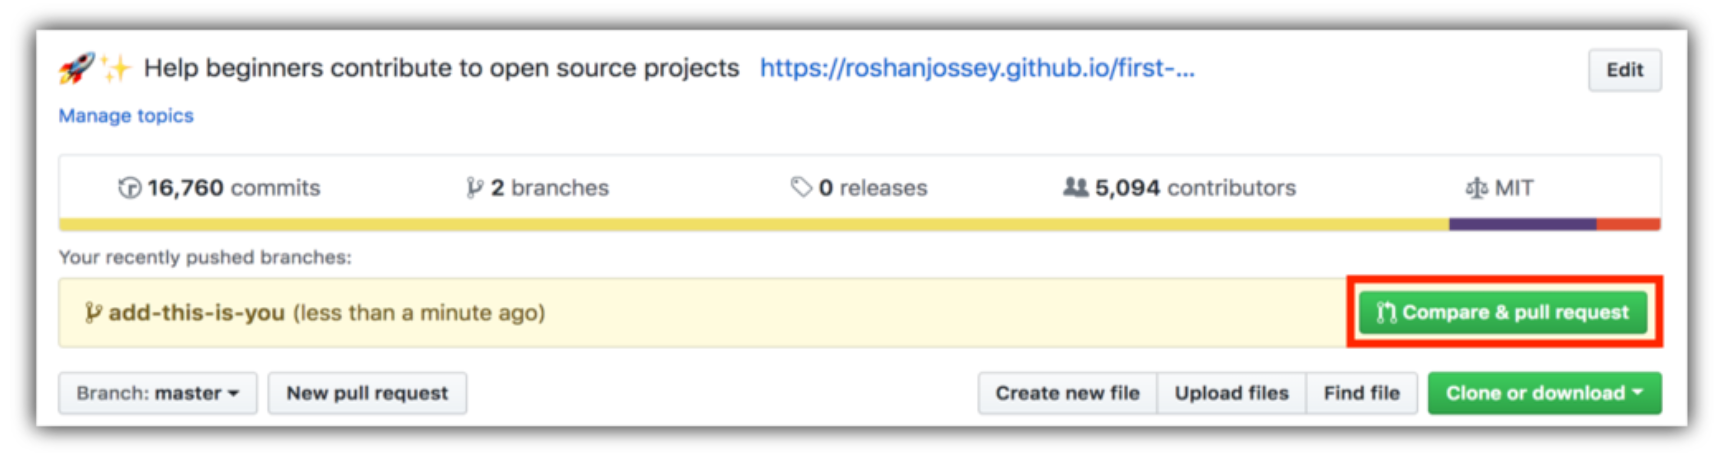
Step 9: Open a PR
To open a PR:
- Go to your repository on GitHub, and click on the Compare & pull request button.
- Provide an appropriate title and comment to your pull request. This is important to let the repository reviewers or maintainers know what changes you are making.
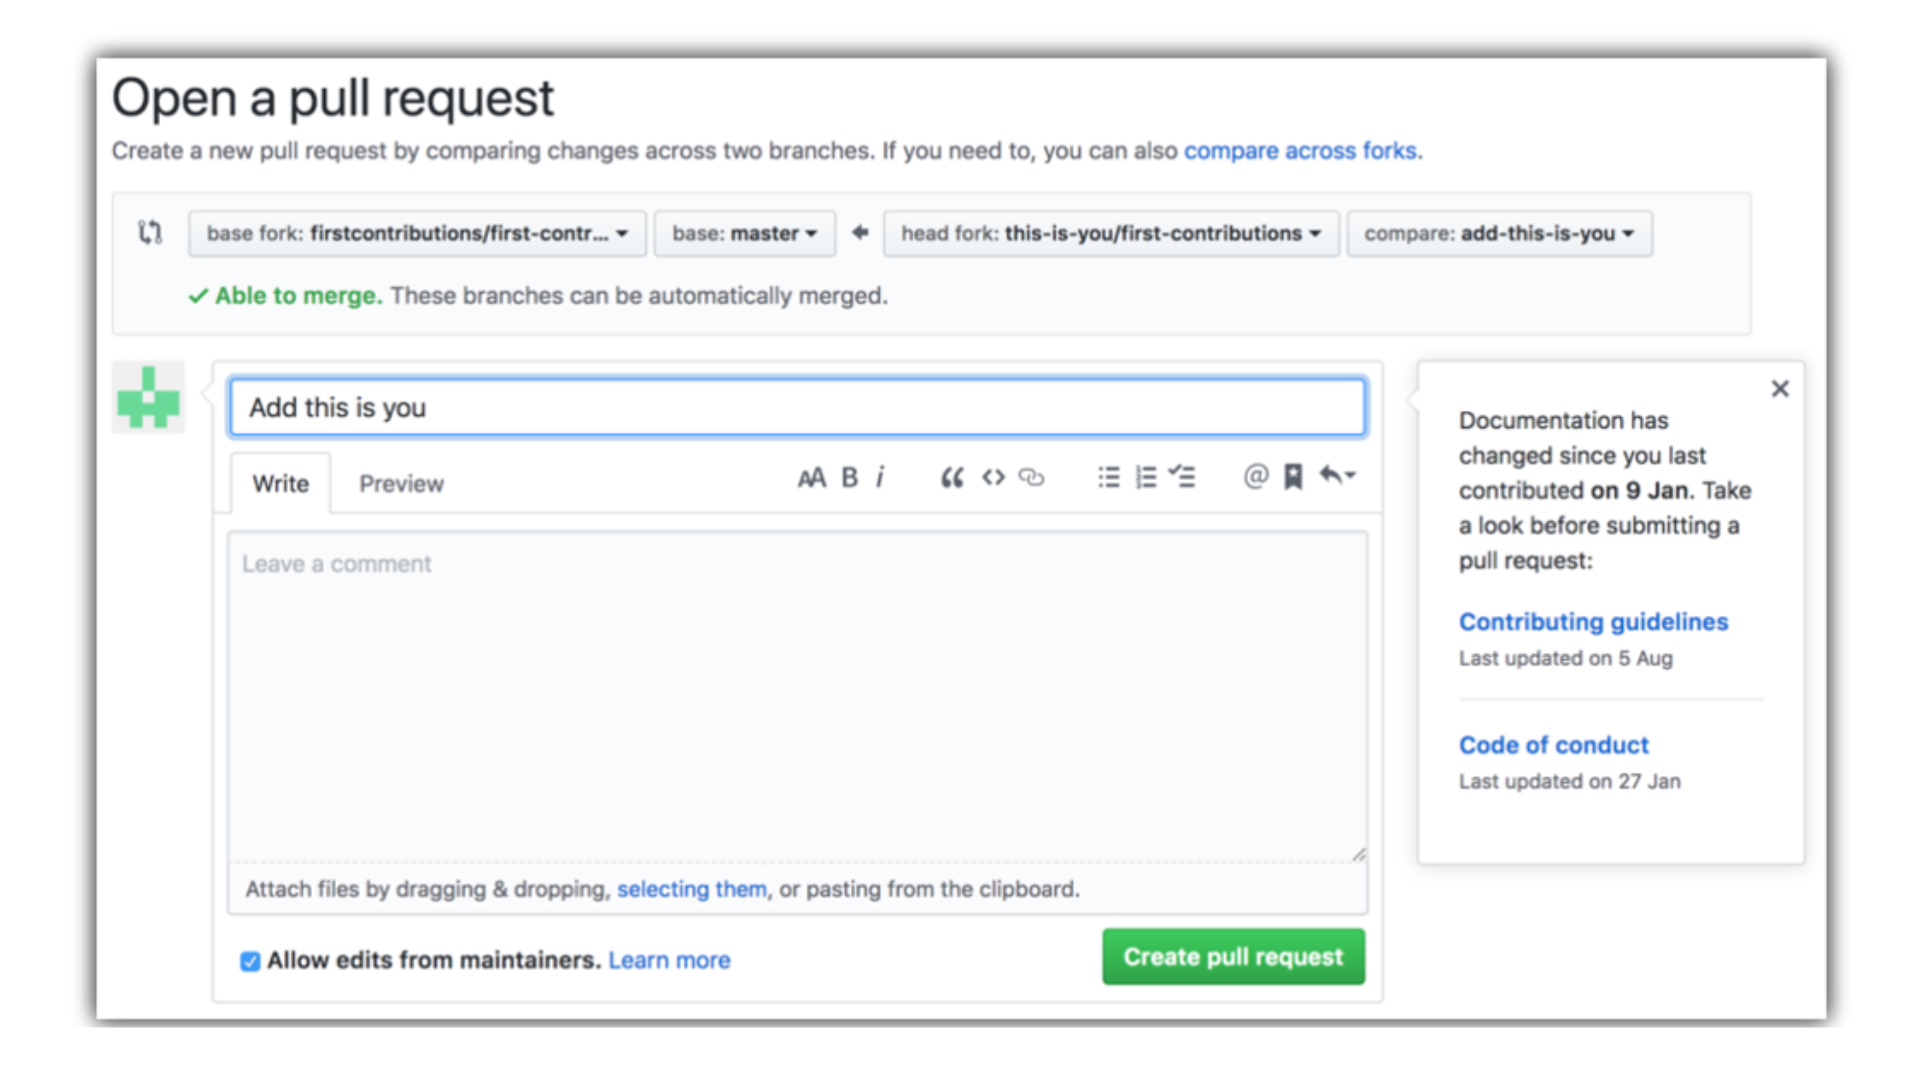
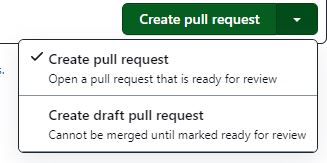
- (Optional) If your PR is still a work in progress, you can mark it as Draft by clicking on the arrow button beside Create pull request and clicking Create draft pull request.
- To submit your PR for review, click Create pull request.
Congratulations! you just submitted your pull request.
What to Expect After Submitting a Pull Request
There are four possible outcomes after submitting a Pull Request:
- You don't get a response. That's fine, don't be discouraged. Sometimes it happens that even projects that seem to be active don't respond after you submit a PR. If you find yourself in this situation, give it some time and then follow up with a reminder on your PR.
- Someone asks for changes to your contribution. Great! Make the requested changes and ask questions if necessary.
- Your contribution isn't accepted. Most open source contributors have been in this situation at some point, don't beat yourself up. Take any feedback given and move on to other issues.
- Your contribution gets accepted. Congratulations! You've successfully submitted an open source contribution.
I hope this article helped you submit your first pull request, if it did, feel free to share yours in the comment section. Follow me here on hashnode or on Twitter for more updates on open source contributions.


